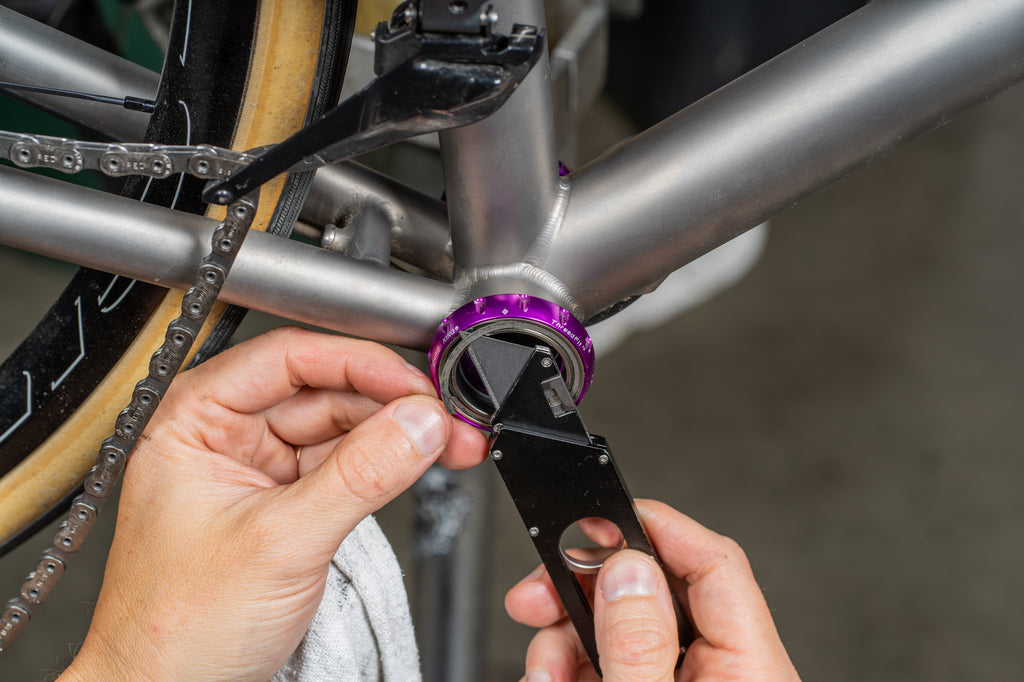
A common question we get is "how exactly do I remove the bearings to service the BB"... well, here's a few pictures to show you, its pretty easy and fast to do.
1) Remove your crankset
There are many varieties of cranks, so refer to the instructions from your specific manufacturer. The ones in the photos below are of a SRAM Crank with a DUB Spindle using a Chrisking Threadfit30 Bottom Bracket

Remove any spacers, washers and adapters and note the specific location so you can reinstall them in the correct place later.

2) Remove the spindle sleeves.
(yours may look slightly different, as the sleeves are specific to crankset)
You can use a small flathead-screwdriver and gently pry below the lip to work it out. It maybe also possible to push it from the backside. Do this with care as not to damage the plastic.

3) Remove the clip
Using a small pointed pick or a thin, small flat blade screwdriver, locate the split in the metal clip.
Gently insert to one side of the split and lever upwards to release the clip.Take care not to damage the seal underneath the clip.


4) Remove the seal
The seal is delicate so take care. It should come off very easily and please note the shape and orientation of it. A used seal will have a sculpted "volcano" shape and this is important to note the orientation for re-installation later.


5) Cleaning the bearings
The bearings are now exposed for cleaning, and there is no need to remove the BB Cup from the bicycle frame, so the bearings can be cleaned on the bike.
Using a toothbrush, rag and some non citrus degreaser / solvent give the bearings a good clean, flushing all the old grease and dirt out.
Do this a couple of times and you will notice a lot of dirt comes out onto the rag and you start to see the bearings and the lighter coloured ball bearing retainer.


6) Drying the bearings
Dry the bearings with either compressed air or a clean rag to remove excess solvent / degreaser

7) Clean the clip and seal
Clean the metal clip and *gently* clean the seal, note for any damage. Replace the seal if you see any nicks, twists or rips .Replace the clip if it is warped or bent. Replacement parts are available (see end of article)

Seal below:

8) Lubricate the bearing
Using Chris King Silver Grease apply a bead of grease 1/2 way around the bearing. Rotate bearing with fingers to distribute the grease fully.


9) Re-install Seal and Clip
When re-installing the seal note the shape and install with the highest point of the "volcano" away / outward from the BB (for a new seal this doesn't matter as the new seal will be flat). If you reinstall the seal the reverse way around you can notice because the bearing will feel like it has a lot of drag.

When re-installing the clip, Start at the split and install in one direction all the way around. The clip fits in a small groove, so use a pick or small flat screwdriver to fully seat. When fully around, run your tool over the split and make sure the two ends of the split are flush and the snap ring is clipped in.

You can see the"split" below close to the 12 o'clock position.
10) Final Steps
Apply a little bit of Blue grease or standard assembly grease to the Spindle Sleeve and push into the bearing. Congratulations, you are now ready to complete the same procedure on the other side of the BB.

Remember when re-installing the crank, put spacers / washers in the same position from the disassembly, when crank is fully torqued to spec check for lateral (side to side) play by apply pressure across the crank arms. If it is loose or there is lateral movement DO NOT ride. Inspect your work and consult a bicycle mechanic as needed.
TIPS:
We recommend servicing you bearings once per year on a bicycle that is ridden frequently.

Spare Parts are available for clips, seals and grease.
Threadfit 24, T47 24mm - Clips and Seals - PHS473
Threadfit 30, T47 30 x or i - Clip and seal - PHS475
ADDITIONAL INFO:
Another tutorial on cleaning bearings here
Chris King Silver bearing grease here
Bottom Bracket Instructions here

